IMPORTANT - Read this first!
Note: To simplify these diagrams, we have not shown the earth cables - but all circuits MUST have the earth cable correctly installed.
To protect the module a suitable rated overcurrent protection fuse must be installed on the Live input.
Installing the Fibaro modules involve working with 230V mains wiring. If you are not comfortable doing this you should consult a qualified electrician.
This application note is provided as a guide, all work is carried out at your own risk. Vesternet do not accept any responsibility or liability.
We work hard to keep these wiring guides accurate and up to date and would appreciate any feedback, corrections or suggestions that you may have. Please contact us using our help page or by simply emailing feedback@vesternet.com
This guide shows how to control Somfy Sonesse 230V blind motors via Z-Wave using the Fibaro Roller Shutter 2 module.
Somfy have a wide range of blind motors available depending on whether you would like 230V AC (mains) or 24V DC power supplies.
This guide focuses on the Sonesse 40WT (230V) motors.
We also have guides for other Somfy systems:
Somfy Sonesse 40WT (230V) Blind Motor
The Somfy Sonesse 40WT is a 230V AC (mains) motor capable of operating roller blinds.
 Figure 1: Somfy Sonesse 40WT Motor Wiring
The standard wiring for the Sonesse 40WT is shown in Figure 1. Live is taken from the junction box to the wall switch and separate wires are taken to the motor (via the junction box) to control the motor's direction - Up and Down. By pressing the 'Up' or 'Down' buttons the motor will wind the blind in that direction until it reaches its 'End -Stop', at which point the motor will stop.
The Sonesse 40WT has mechanical 'End-Stops' that are adjusted to set the blind's fully open and fully closed positions.
Installing the Fibaro Blind Control
The Fibaro Roller Shutter 2 is designed to control 230V powered motors, it has two switched contacts that can control the motor's direction (Up/Down). The Fibaro Roller Shutter 2 also has a 'calibration' feature that you can use to automatically position the blind in your favourite position.
 Figure 2: Somfy Sonesse 40WT Motor Wiring with Fibaro Roller Shutter 2 Controller (FGRM-222)
Wiring the Fibaro Roller Shutter 2 as shown in Figure 2, allows you to control the blind manually from the wall switch or wirelessly via Z-Wave.
Set-up
Setting up the Fibaro Roller Shutter to control the Somfy 40WT is straightforward, in most cases you can just use the default settings. For Somfy 40WT (or similar), set Parameter 10 to 1 (Blind with Positioning active) and Parameter 14 to the correct switch type - momentary (3-position switch), toggle or single momentary
Fibaro Roller Shutter 2 Connections
The Fibaro Roller Shutter 2 has six terminals to connect it to the motor wiring:
|
|
Fibaro Roller Shutter 2 Parameter Setting:The following parameters may need to be set:
|
Calibration
Once you have the Fibaro Roller Shutter 2 installed (including adding it to the Z-Wave system) and you've tested that it controls the blind correctly, you can run it's calibration process so that it knows the blind's fully open and fully closed positions.
The calibration process consists of an automatic, full movement between the limit switches (up, down, and up again). The Fibaro Roller Shutter has four ways to run its calibration process, choose the most suitable one for your system:
A - Using Fibaro Home Center
Easy process if you're using the Roller Shutter with Home Center 2 (HC2) or Home Center Lite (HCL).
- Go to the Roller Shutter's 'Advanced' tab
- Click the 'CALIBRATE' button
- The Roller Shutter will run its calibration process - Up, Down and Up again
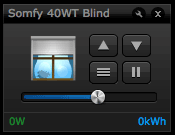
 Figure 3: Somfy Sonesse 40WT and Fibaro Roller Shutter in Fibaro Home Center
B - Using the Z-Wave Network
A good solution if you're using another Z-Wave controller, such as Vera.
- Go to the Fibaro Roller Shutter's Settings section
- Add Parameter 29 and set it to '1'
- Save the configuration settings
- The Fibaro Roller Shutter will run its calibration process - Up, Down and Up again
- Parameter 29 should automatically be reset to '0' when the calibration process has completed (you may need to do this manually)
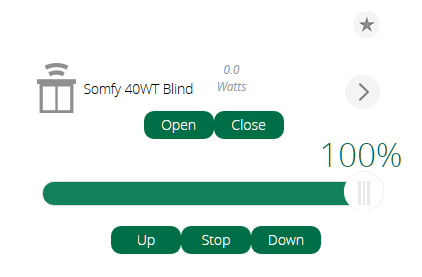
 Figure 4: Somfy Sonesse 40WT and Fibaro Roller Shutter in VERA UI7
C - Using the Manual Buttons
Alternative solution if you want to activate the calibration process manually.
- Press and hold either the 'Up' or 'Down' button for 3 seconds
- Press and hold the same button for 3 seconds
- Press and hold the same button a third time for 3 seconds
- The calibration process will now run - Up, Down and Up again
D - Using the Roller Shutter's 'B' Button
Another way to activate the calibration process manually.
- Press and hold the Fibaro Roller Shutter's 'B' button for around 6 seconds until the LED glows Blue
- Release the 'B' button and then press it again briefly
- The calibration process will now run - Up, Down and Up again
When the Calibration process has completed, the Fibaro Roller Shutter 2 will know the correct position of the blind - this allows you to set the blind to any position you wish. All percentages are expressed as a percentage of open, so 0% means fully closed, 100% is fully open.
Video
Related Information
- KB-52 - Where to buy blinds
- APNT-74: Somfy Sonesse 30DCT (24V)
- APNT-75: Somfy IRS 300 (24V)
- APNT-79: Somfy RTS (wireless)
- APNT-80: Control blinds in VERA based on Environmental conditions
- APNT-81: Control blinds in Fibaro based on Environmental conditions
- APNT-50: Adding Devices in Fibaro Home Center
- APNT-48: Adding Devices to VERA
- APNT-30: Controlling Blinds and Motorised systems with Fibaro


