This guide shows how to Include devices to your Z-Wave network using the VERA Z-Wave Controller running UI7 firmware.
In Z-Wave terminology, when you add a device to the network, this is called "Including". A device must be "Included" to the Z-Wave Network before it can be controlled. This process is usually achieved by pressing a sequence of buttons on the Controller and Devices.
Adding Devices
When you Include a new device, VERA scans the whole network to understand where each device is in relation to other devices. This is needed so that it can correctly route signals through its neighbour devices.
For that reason it’s extremely important to Include every device – especially Mains Powered devices – in its final resting position. If you move a device after inclusion you must perform a full Z-Wave network heal.
VERA has two ways to Include devices, you can choose the one best for your situation.
Portable Inclusion
Unlike previous versions Vera Edge doesn’t have the ability to be powered from batteries. That means you’ll need a power socket available if you need to move it. This is hardly ever required though and we advise to use the Standard Inclusion as you can watch what is happening and name the devices as you add them.
For portable inclusion:
- Take VERA for within 1 meter of the device to be included
- Connect it to a power supply and wait for all LEDs to turn on
- Press the Sync button on the Edge side – the Z-Wave LED should start flashing
- Put the Z-Wave device into Inclusion mode - usually press its Include button (See device's User Manual)
- The Z-Wave LED should stop flashing – give VERA a few seconds to finish configuration
- Reconnect VERA to its power and Ethernet cables and check for the new device
Standard Inclusion
In most cases you can leave VERA in place and use Standard Inclusion as full strength wireless signals will be used. This will allow most devices to be Included without moving them or VERA.
Keep in mind that some devices deliberately lower the Including range for about 1 meter between the Device and Controller. This is done for security purposes but most devices can be Included from much further away.
A Device Wizard provides step-by-step instructions to guide you through the Inclusion process. Steps will be different for each Device that can be Included so it’s important to choose the exact model you are installing whenever that’s possible.
- To launch the Device Wizard click the "Devices" tab and then click the “+ Add Device” button

- Expand the “Additional Devices” section and you’ll see a list of Device categories as shown below.
- In this example we will Include a Fibaro FGFS-101 Flood Sensor. Select the category the Device is in, which in this case is Sensors.

- Click on the "+" button next to Sensors, and you'll see a list of sensor models that looks like this:
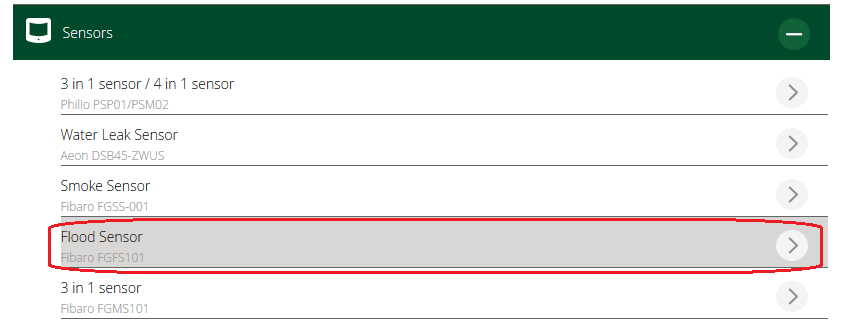
- Scroll down the list to select the specific model you are Including. Click on it, and you'll see specific instructions for that particular device.

- Follow the Device Wizard instructions for putting the sensor into "Inclusion" mode.


- If all goes well you should receive a message saying the device was successfully added. You can now name the device and assign it to a room.

- When you are finished adding new Devices, go back to your list of Devices on the Dashboard

Include Generic Device
VERA continuously updates the available Device Wizards to keep up with the market so chances are most your devices are supported by the Device Wizard. However if your device is not there you can still include it using the “Generic Z-Wave Device” option.

The process is very similar to the one described above although without any specific instructions.
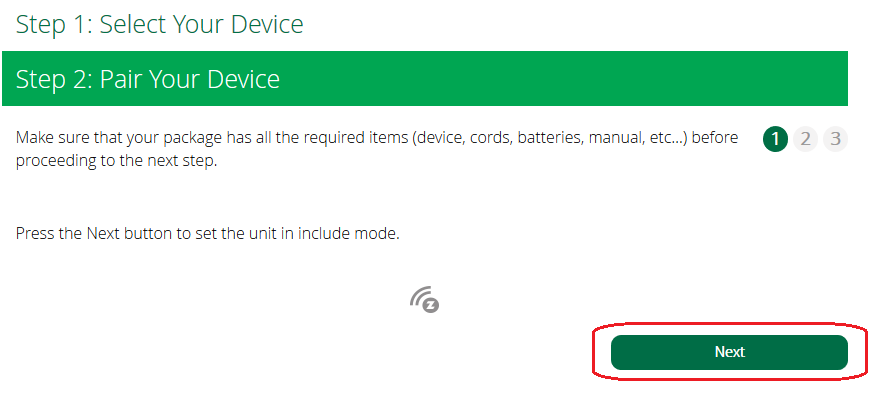
- Set your device into Inclusion mode by following the process describe on the user’s manual – usually by pressing or triple-pressing its Inclusion button.

- You should be greeted with a success message asking you to name your device and assign it into a room.

- When you are finished adding new Devices, go back to your list of Devices on the Dashboard

Exclude/Reset Devices
Sometimes it is useful to Reset a device before Including. This is especial useful if you are having troubles during the Inclusion process.
By Excluding the device, you reset the device's memory ensuring that it is not Included in any Z-Wave network. This is a good practise to adopt when adding any Z-Wave device.
- If VERA is unable to complete the Inclusion process it will suggest you to reset the device.

Device from Compatibility List
- If you are Including a device on VERA’s Compatible Device List specific instructions for the Reset procedure will be provided.

- After device is successfully Excluded try to Include the device again.

Generic Z-Wave Device
- If you are Including a Generic Z-Wave Device similar steps will be provided without any specific instructions – please refer to your device’s manual.
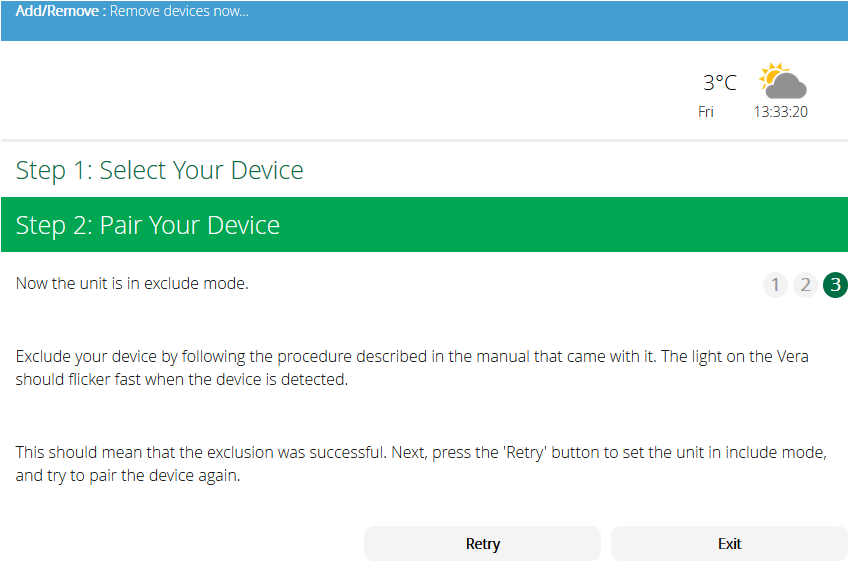
- After device is successfully Excluded try to Include the device again.

Tips on Including Devices
These tips may help you to more easily Include devices to VERA and Z-Wave networks:
Exclude the device First
Excluding the device first ensures that its memory is reset. This usually fixes any issues you may have in Including devices to a Z-Wave network so it is worth doing as standard practise.
Adding Battery Powered Devices
After adding the device it will probably not be fully configured - you will have a red “Waiting for wakeup to configure device” message.
To finish configuration, you must wake-up the device
- Press the device's button to make it wake up (See device's User Manual)
- You will now see VERA finish configuring the device
Heal Z-Wave Network after Including devices
When you Include a new device the Z-Wave Controller scans the whole Z-Wave Network to understand where each device is in relation to other devices – this is needed so that it can build a “routing table” that will be later used to route communications through other devices when needed.
Performing a "Heal" is especially important when you've Included battery or portable devices using the "Standard" Inclusion and then moved them to their final location.
In VERA this process is known as a Network Heal:
- Go to Settings > Z-Wave Settings
- Go to the "Repair" section
- Click the "GO" button
- The heal process will take a few minutes - or hours - depending on how large your network is
- During the heal process, make sure all battery devices wake-up
Note: from version 1.7.649/1.7.1320 Vera has removed this option.
Video
Take a look at the video to see how easy it is to Include devices to Vera.
Related Information


